
Soldering
is a skill that is often utilized without much attention. Just
because two joints appear to be physically connected does not mean
that they will make a good electrical connection. As always, the
right tool will make the job infinitely easier. If DIY or custom
projects are always on the menu, it is definitely worth it to invest
in a high quality soldering iron. For occasional users, a basic
soldering iron from a local electronic shop will do, provided that
the proper technique is used along with some aides. It may seem like
high power soldering irons are made for professionals and electrical
engineers. However, basic soldering applications such as power
connections are actually the jobs that demand these high performance
devices.
To solder
a joint properly, it is crucial that all of the connection surfaces
to be soldered together get heated to the melting temperature of the
solder. In addition, the joint must be allowed to cool without
movement. If these two criteria are achieved, a good electrical
connection is made. Here are the soldering steps that will accomplish
this task easily.
- (optional) Surface cleaning
This step is optional as most surfaces are usually susceptible to solder. These surfaces include new/clean electrical wires and contacts, as well as recently desoldered connections. If a metal contact is not meant for soldering, there are a few tricks to make it bond better with solder. Sanding the surface makes it rough and allows the solder to better stick to the surface. Using a cleaning agent such as rubbing alcohol or contact cleaner before soldering is also a good idea by removing contaminants that may weaken the solder bond.
- Tinning the connections
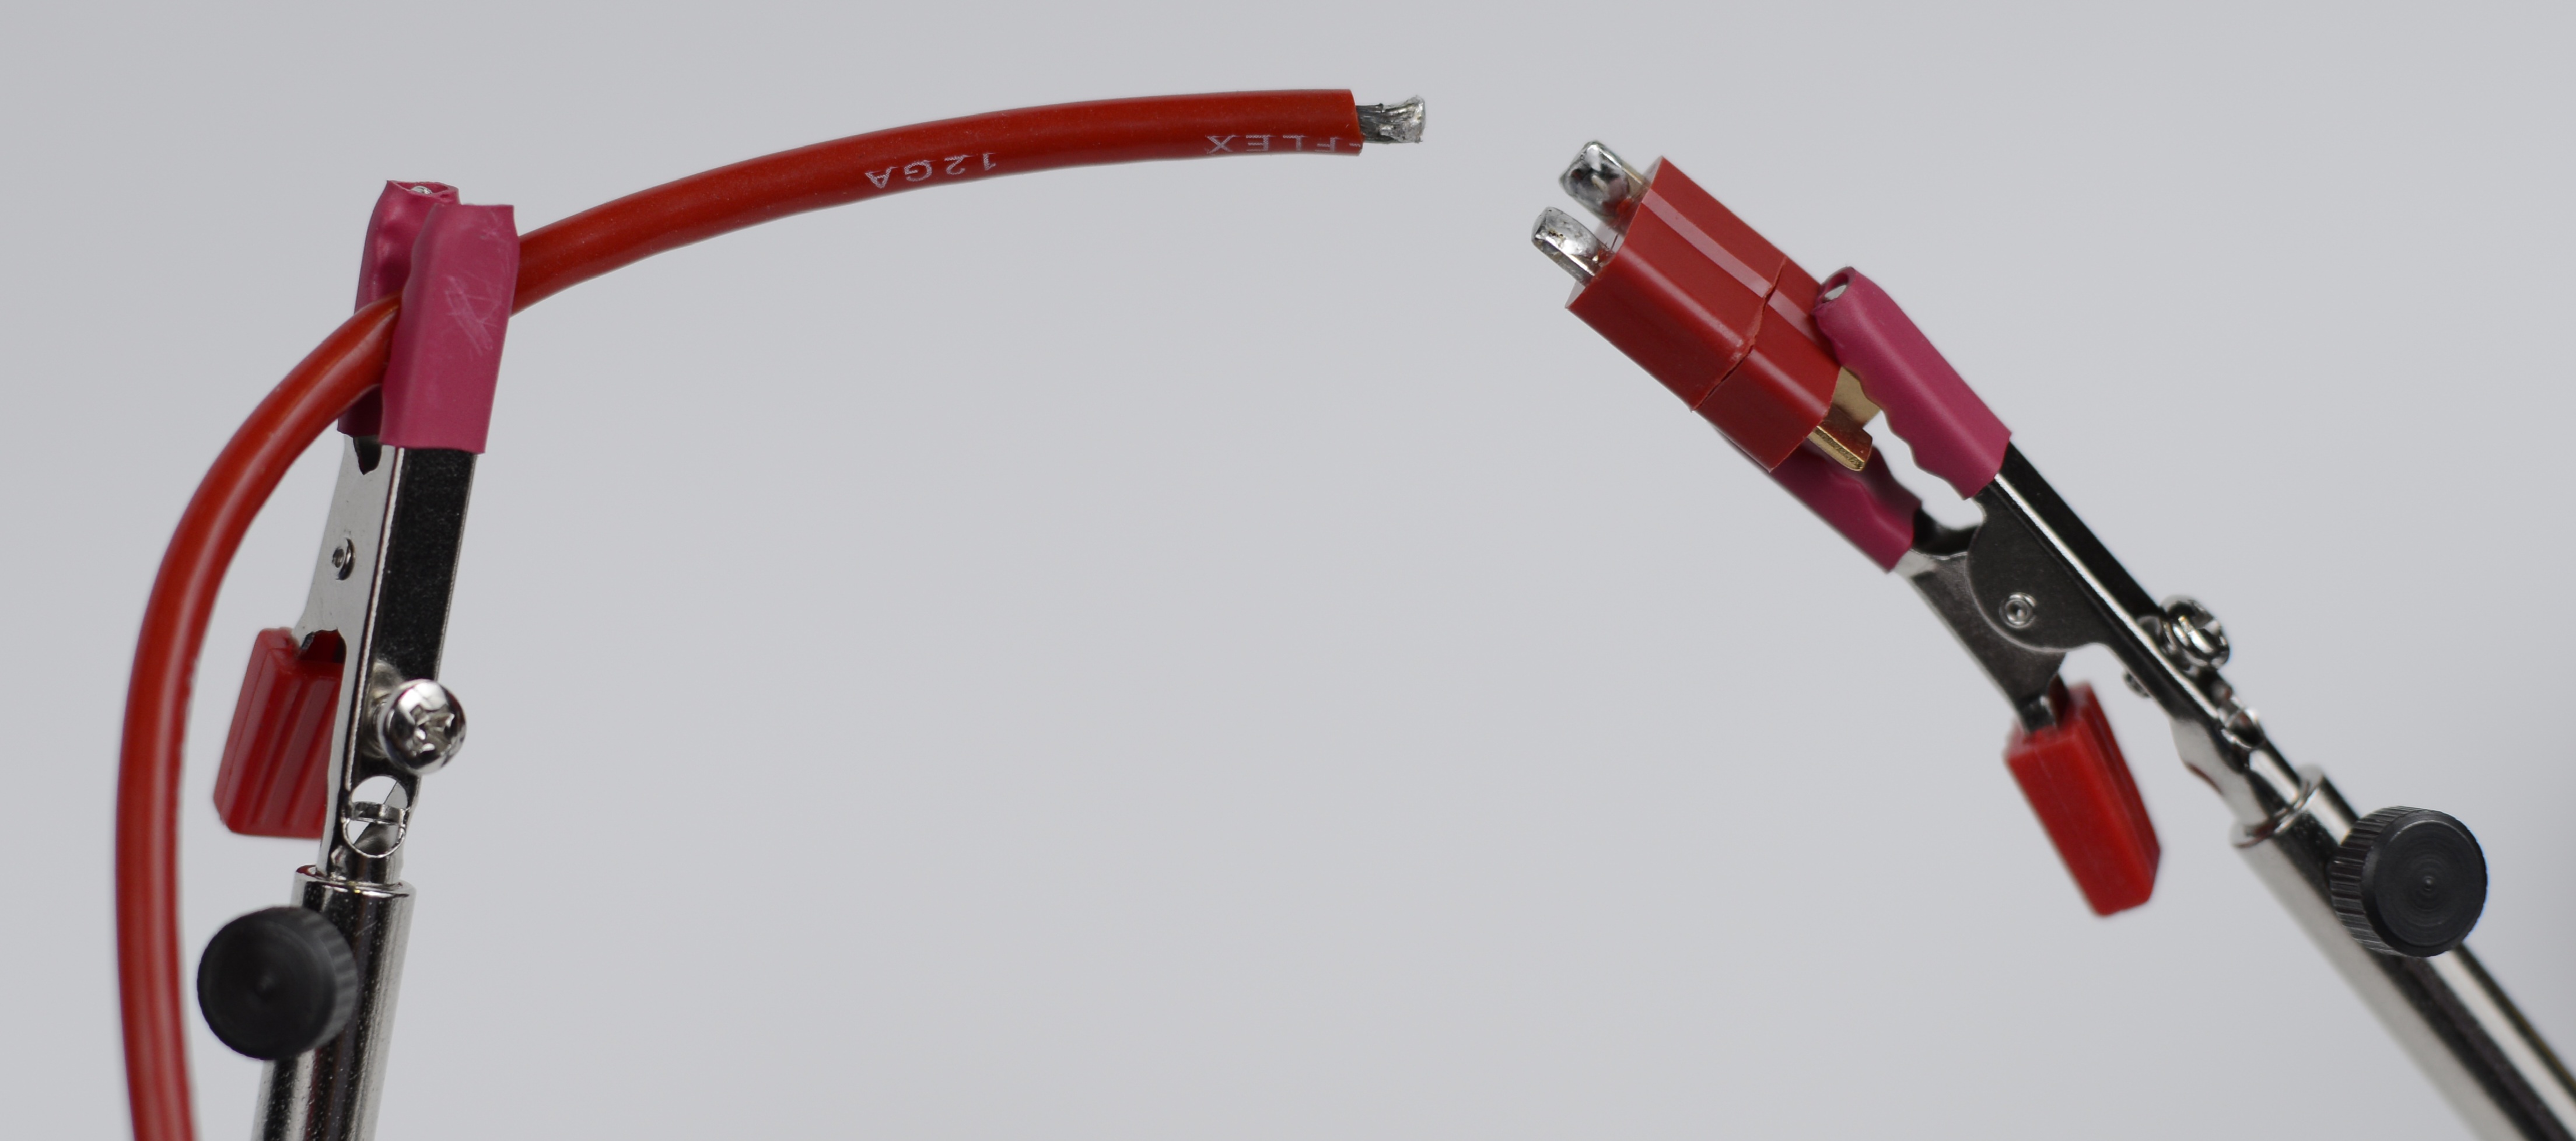
This step will greatly simplify difficult soldering tasks such as power connections. Tin all of the separate connections to be joined by applying the soldering iron on the connection and pushing a thin layer of solder onto it. It is a good idea to secure the connection (see figure below) and apply flux to the connection (see step 3) before tinning. An example of a tinned wire and contacts are shown in the figure below.
 Fig. FA2.1 – tinning example
- (optional, highly recommended) Fluxing the connections
If a budget soldering iron is used, flux is its favorite companion. Even with a high power soldering iron, flux will make any soldering job easier. What it essential does is make solder flow better and near guarantees a good electrical joint. It also increases thermal contact between the connections and the iron. To use flux, apply a thin coat of the liquid substance to the soldering surfaces. Flux comes in various mediums of dispersion, such as a bottle, can or pen. A pen is arguably the most convenient. In the end, as long as the flux is coated onto the surfaces, its dispersion method is insignificant.
- Securing the connections
This is a very important step in soldering. A common mistake is to rush through this step to quickly jump into soldering. When this is conducted, chances are the unsecured connections move during soldering and the entire procedure has to be repeated, wasting additional time. Instead, patiently and firmly secure all of the connections to be soldered with third hands, vices, clamps, tape or any other feasible methods. The surfaces to be soldered should contact each other with sufficient force to resist movement during soldering. Well secured connections also prevent the connections from moving during the cool down process, satisfying the second criteria necessary to create a good electrical joint. In conclusion, doing this step properly goes a long way for the rest of the process. An example of a well secured platform ready for soldering is shown in the figure below. Fig. FA2.2 – secured connections example

- Tinning the tip
A tinned tip provides maximum heat transfer between the soldering iron and soldering surfaces. First clean the tip by swiveling it in a sponge or using a tip cleaner tool. Then, tin the tip by swiveling it in tip tinner or applying a small amount of solder around the tip. Clean off the excess material on the tip with a sponge or a tip cleaner tool. Once this is done, the tip should be nice and shiny, ready for soldering. Quickly proceed to soldering afterwards or the tip tinning process will have to be repeated.
- Soldering
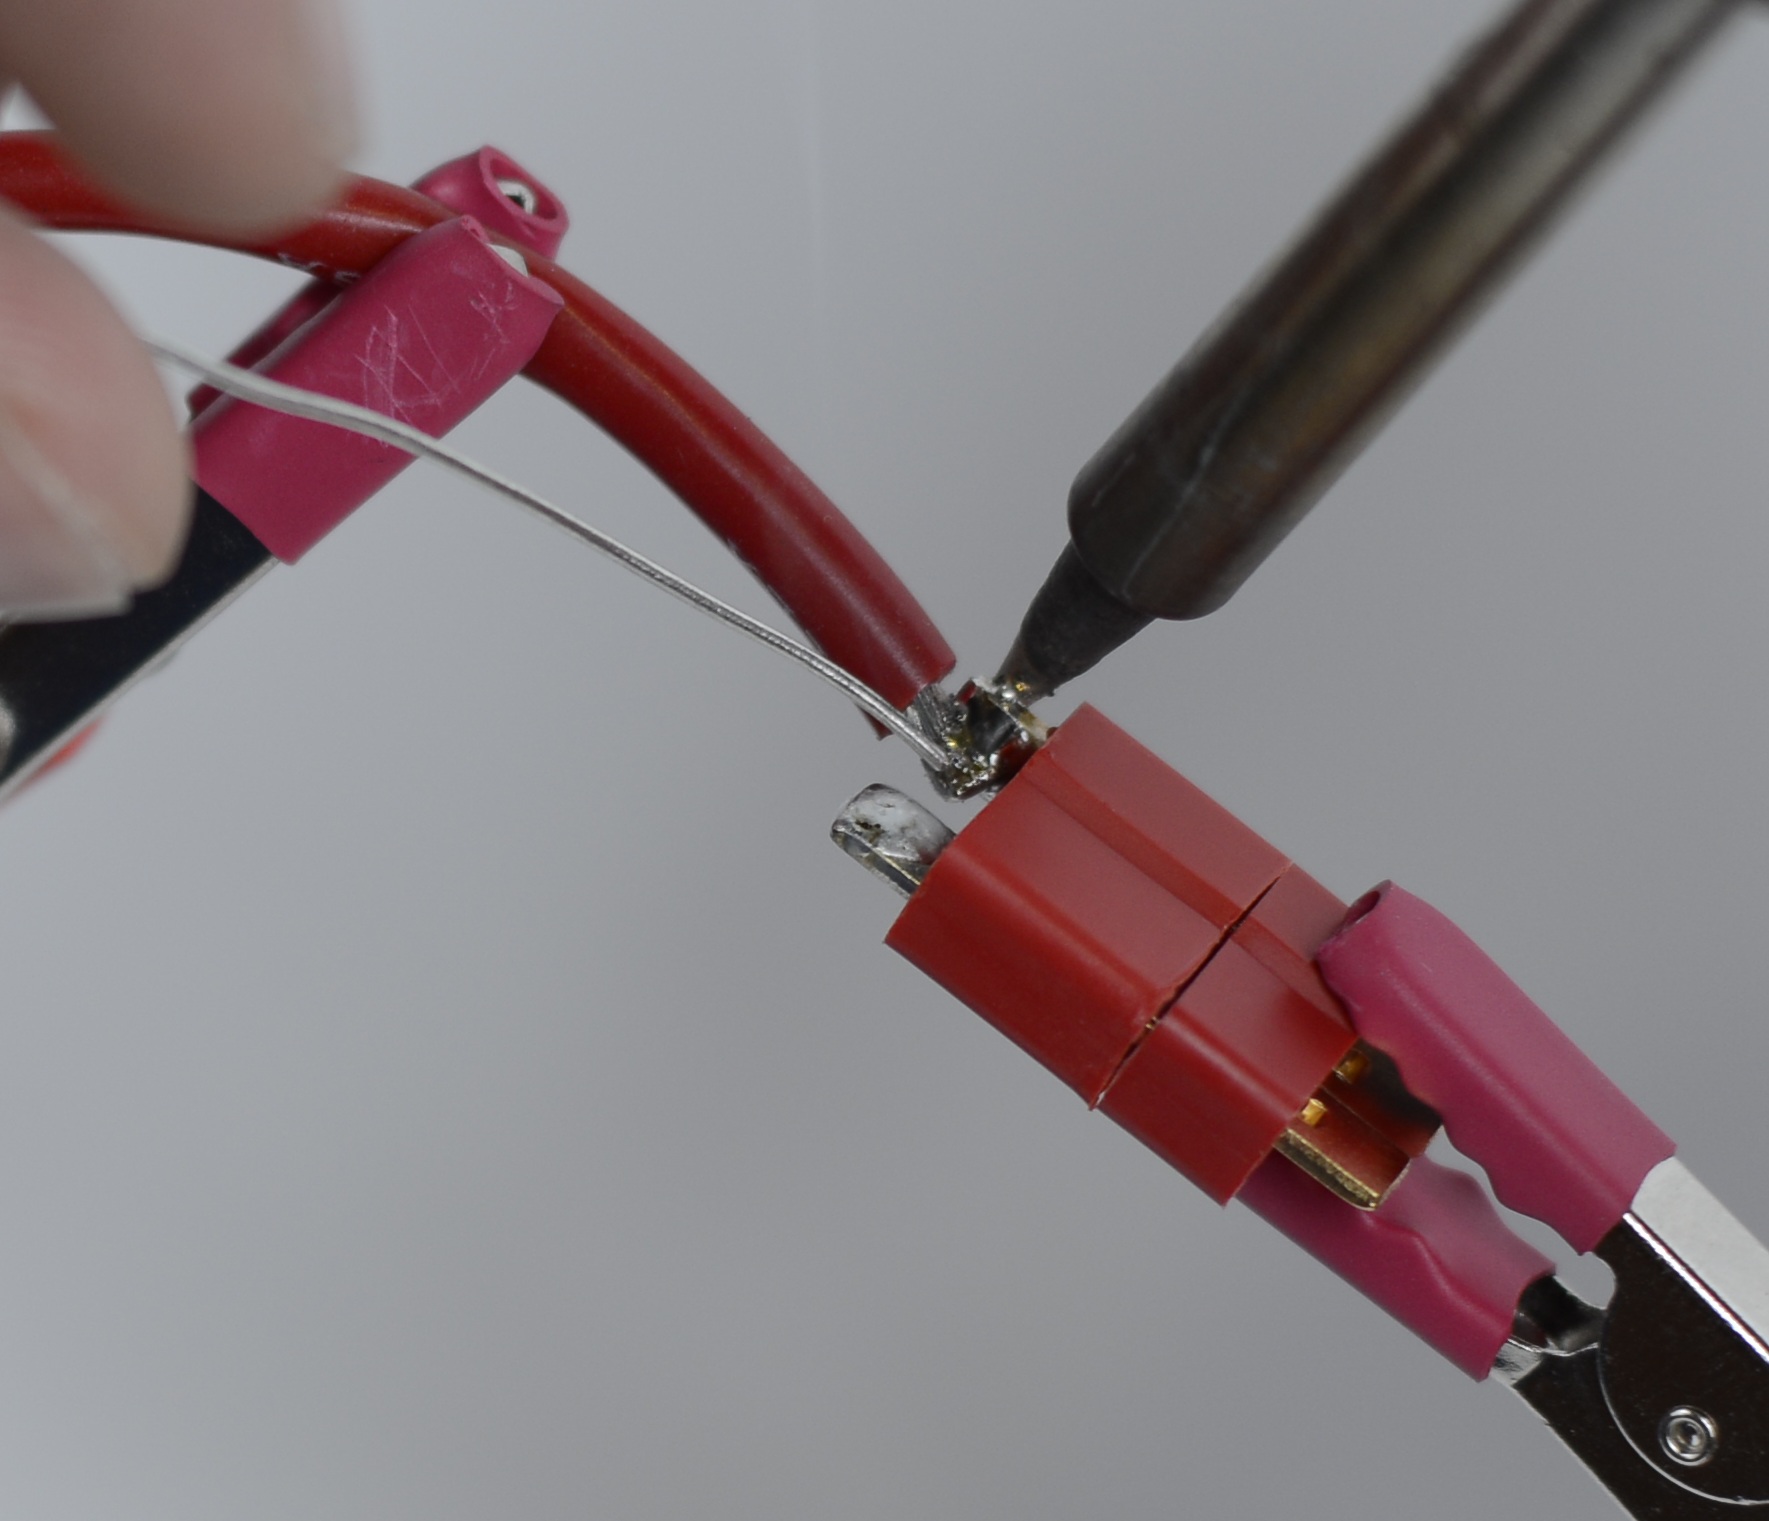
To effectively solder a joint, maximum heat transfer from the soldering iron to the connection surfaces is desired. To do this, apply the soldering iron to an area on the surface that will form the most contact with the tip. A common mistake is to use the tip of the iron tip (pointy part of the tip) to transfer heat. Although convenient, the very tip of the soldering iron is the least efficient way to transfer heat. Instead, use the sidewalls of the iron tip to solder. In addition, applying solder to the sidewalls of the tip after the iron contacts the desired connection surfaces is another way to increase heat transfer. Doing this increases the contact area between the iron and connection surfaces, allowing a higher rate of heat conduction. Although this method can be used to shorten the heating process, it is incorrect to solder by flowing solder through the tip. Flowing solder through the tip should only be used initially to increase surface contact between the tip and connection surfaces, it should not be the final step of soldering. Once solder is applied to the iron tip, it can be directly transferred and applied to the hot joint by simply relocating the solder feed from the iron tip to the joint. It is crucial for the final solder feed process to not touch the iron tip. Once the solder is able to be easily fed into the joint, the joint is hot enough to melt the solder and the proper temperature is reached. Keep applying solder until a layer covers all of the connection surfaces in the joint, but not so much that it creates a bubble of solder on the joint. A closeup of a final solder feed example is shown below.
 Fig. FA2.3 – soldering exampleNote that in this example, the soldering iron is applied to the backside of the connections joint. The soldering iron can be applied anywhere that allows for good heat transfer. It is a good idea to separate where the solder is being fed into the joint and where the soldering iron is applied (shown above) to ensure that the entire joint reaches the melting point of the solder.
- Lifting the soldering iron
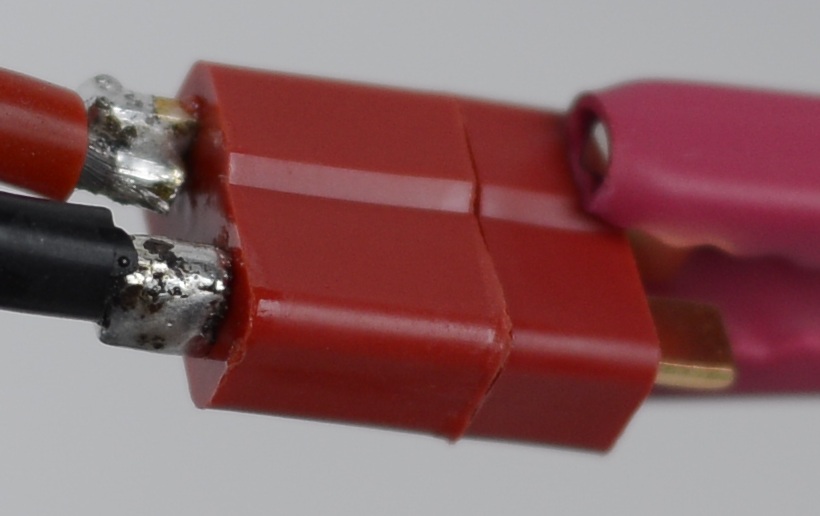
Once the desired amount of solder is applied, stop the solder feed and lift the iron from the joint. Do not lift the iron too fast or too slow, as doing so may cause undesired solder movement. The iron should be lifted in a quick manner; too slow will cause the solder to stick onto the iron during the lift and too fast may do the some thing with a sharp solder trail. If the solder keeps sticking to the join after a few attempts, apply some flux to the joint to easily prevent the problem. When soldering leads that will be cut after the solder such as through-hole components, it is a good idea to lift the soldering iron by dragging along the excess lead. This way, any trailing solder will stick to the excess lead, which will eventually be trimmed. As soon as the iron is lifted, be sure that none of the connections move during the cool-down process. If it does, a cold joint that may exhibit unpredictable electrical characteristics is created. This is why securing the connections from the beginning is crucial, as properly doing so will ensure the connections to not move during cool-down. In addition, do not blow on the joint to speedup the cooling process. This is a common mistake done by many. It may trap air pockets under the solder surface and create a cold joint. An example of well soldered joints is shown below. Fig. FA2.4 – finished joints exampleNote, the black burn marks are residual flux from soldering. It can be cleaned with water or acetone or whatever the flux used is soluble with.
- Inspection
In general, a shiny joint surface indicates that the electrical connection is good while a jagged joint surface means it is bad. With leaded solder, it is easy to tell whether a joint is good or not, as a shiny joint will always imply a good joint while a dull one will certainly indicate a bad one. However, with lead-free solder, it is harder to tell because a dull joint surface could mean a good or bad joint. The only way to distinguish the two is to be sure that the joint reached the melting temperature of the solder during soldering and that the joint did not move during the cool down process. Confirmation of these two conditions will guarantee a good electrical connection.
Following
the steps outlined above will ensure a proper soldering technique.
With enough practice, soldering will become a simple process. Here
are a few addition tips that may be useful:
- Use lead-free solder for high temperature applications, such as motor and power leads
- Use big tips for soldering large joints. Most soldering irons come with needle tips for soldering small connections. Replace them with bigger tips to easily and efficiently solder large joints.
- Always remember to put in heat shrink before soldering when necessary!
- Be aware of the soldering iron and its surroundings, the iron can unintentionally melt materials as well as cause injuries.
- Remain calm and do not get frustrated. Do not skip any steps when soldering, as it will often take more time to correct the mistakes caused by them. Do things right from the beginning to ensure a quick and easy job.
Regarding
the first tip, it is extremely important to use lead-free solder for
high temperature as well as potential high temperature applications.
The melting point of most leaded solder is 361 °F,
while 441 °F is the
common melting point for lead-free solder. Although most hobby
systems should never reach these temperatures, using lead-free solder
will ensure a reliable connection under extreme conditions.
In
terms of advanced soldering techniques, temperature setting of the
soldering iron is important. Different chemical compositions of
solder have unique melting properties. Some have a melting range,
where the temperature at which the solder melts varies greatly and/or
may gradually melt over a temperature range. Others have a defined
melting point, where the solder instantly transforms from a solid to
a liquid at a certain temperature. There may also be maximum
temperature restrictions, where the solder cannot form a good
electrical connection when soldered above a certain temperature. All
of these attributes can be found within the solder's
description/datasheet. One thing to keep in mind is that the solder
iron's temperature setting does not equate to the soldering
joint's temperature. Heat transfer occurs over time. A greater
temperature difference between two objects (iron and joint) means
faster heat transfer during contact, allowing for faster soldering. A
solder with a maximum temperature limit does not mean the soldering
iron used to solder it cannot be set above that limit. If the iron is
applied briefly to the joint, the joint will not reach the iron's
temperature and it will be within the maximum temperate limit of the
solder. If the solder is sensitive to its upper temperature limit,
the iron temperature should not be set far above the specification.
It is recommended that beginners use a relatively low iron
temperature setting and gradually increase it over experience until a
favorable setting is acquired. In general, do not set the iron
temperature above 850 °F.
It is also good practice to never apply the soldering iron for more
than a few seconds after the joint reaches the melting point of the
solder (a few seconds after the solder is easily feed-able).
A
few recommended soldering supplies are listed below:
- Lead-free solder (99.3% Tin, 0.7% Copper; for high temperature applications)
-MG chemicals 4901 Sn99: amazon - Leaded solder (63% Tin, 37% Lead; for low temperature applications)
-MG Chemicals 4880 Series: amazon - Tip cleaner
-Hakko Tip Cleaner 599B-02: amazon - Water soluble flux
-SRA #80 Water Soluble Soldering Flux Pen: amazon - Tip tinner
-MG Chemicals 4901 SAC305: amazon - Solder Sucker/Desoldering pump
-Paladin Tools 1700 Desoldering Tool: amazon - Desoldering braid
-Chemtronics 10-5L: mouser
Thanks for the soldering advice. Its been almost a decade and a half since I last did any soldering and since I have a Nerf project I wanna work on plus some light up cosplay, this has been invaluable.
ReplyDeleteHi, thanks for your review on best soldering irons but still there are some features of soldering irons that are not mentioned in this article. If someone is looking to buy the best butane soldering iron then I'd love to recommend this list of best soldering irons where you will find the right one for your needs
DeleteHi, thanks for this wonderful piece of information about soldering irons. Well, if someone is looking to buy the best soldering iron then I'd love to suggest this list of best soldering irons where you will find the right one for your specific needs. I found the best one from this list.
ReplyDeleteGreat piece of information. desolder and solder correctly is a great topic to discuss. In this electronic product base world one should always know the role of soldering.
ReplyDelete"""It was really insightful.
ReplyDeleteThanks for the info. I have learned lot's of solder knowledge.
Wanna have more contents from you.
Cheers”"""
Also, You can Check Soldering Gun idea here.