
https://jtsplatmaster.com/jt-splatmaster-z300-sniper
I ordered mine online through Walmart because it was the cheapest deal I could find with almost free shipping (you have to spend $0.05 more):
http://www.walmart.com/ip/JT-SplatMaster-z300-Sniper/27448965
When I unboxed the blaster, my first impression was: "Wow, this is one sweet blaster!" Then I tried to stuff in a dart, and surely my heart sunk faster than the original momentary rise in excitement. The problem is, there is a long, larger barrel nesting or telescoping the smaller, main firing barrel. I didn't know this at the time nor did I have a good push rod with me. I used the cleaning stick that came with the blaster and blindly attempted to jam the dart into the appropriate barrel. Without much feedback, I was probably barely getting the dart into the firing barrel, which resulted the poor initial performance I saw.
Being busy with many things, I set aside the blaster, only to return to it one afternoon when I spontaneously decided to disassemble it while relaxing and watching some good old Netflix :)


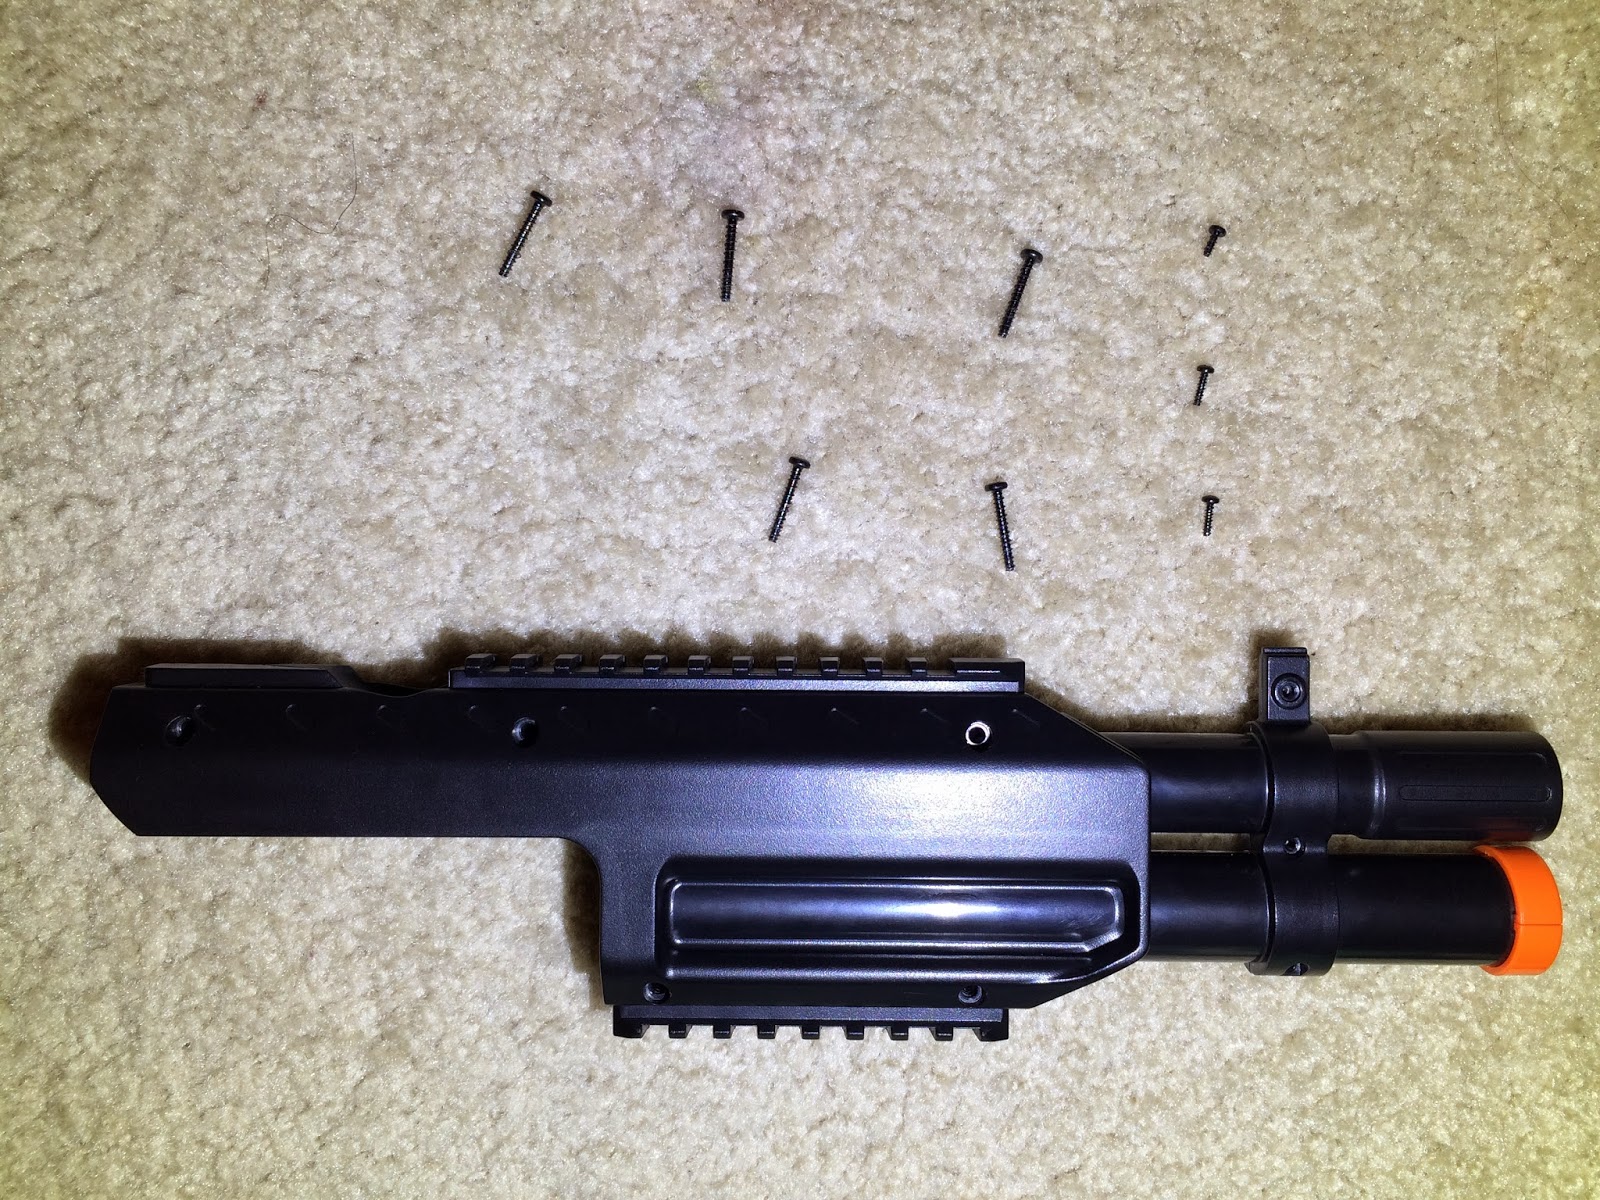
The blaster disassembled beautifully. There were no trick. Just take off the stock, unscrew everything, and it all comes apart. One thing to note is the huge spring! The overlapping barrel that I mentioned earlier is actually apart of the entire front assembly, which does not split apart after removing the screws because of the one solid piece orange tip cap. You can split this piece into two halves just like the process that is done with BuzzBee/AirTech blaster to completely split open the front assembly. However, I was able to easily slightly split open the front assembly on the side opposite to that of the orange tip to access/remove/reassemble anything of interest. One thing to note is that the screws in the blaster are not consistent in length (and may even be different in size and/or thread), so it is crucial that you make a screw map and not accidentally disrupt it. The screw map I laid out is shown in the second picture of the above photo series. The third picture shows the front assembly along with its screw map as well.

At the first glance of the internals, it seems clean, simple and cut to the chase; all traits leading to a good, solid design. After I removed the spring and all of the inner components were freely able to move about, I instantly saw how the blaster operated.

First, the side lever connects and pulls the entire plunger back by hooking onto a hole attached to the plunger circled in yellow above. Once the plunger is completely pulled back, the catch (red circle) catches the plunger rod on the plunger rod lip (orange circle). Once the outer plunger is returned to its forward position, the prime lock (green circle) prevents the user from cocking the blaster when it is already cocked. This works by having the plunger rod lip push the lock up when the plunger rod is also in the forward position, unlocking the entire plunger system for priming.
Based on Torukmakto4's pictures of the z100, it seems like the z100's seal for the ammo loading break is made with a rubber to foam interface. Since both of these materials are elastic, this creates a very effective, ideal seal. The seal on the z300 is not as good as that of the z100. Its interface is made between rubber and hard plastic.

While inspecting the blaster's functions, I realized that if the shell is cut at a certain place in a certain shape, the blaster can rear load Nerf darts (specifically, short stefans) without any additional modification! However, the rubber clamp/seal in the barrel assembly quickly shot this idea down. It was very hard to push darts into the barrel through this rubber section. Doing so would require jamming the darts very hard, which may result dart damage and/or deformation. The process also took a while to do, making it not viable in an intense, war situation.
As I was contemplating how to reassemble the blaster, I realized that the entire front section of the blaster is completely useless for my purposes (single loading darts with a push rod). So I decided to exclude this entire section when I reassembled the blaster. Afterwards, without the long outer barrel (part of the front assembly) that telescoped the firing barrel, front loading darts with a finger/push rod became a normal task again and the blaster is now a viable weapon in battle!

One thing to mention is that with this minimized system, it becomes very difficult to aim this blaster. You would most definitely have to make your own aiming system. From the shell design, I think the perfect place to place such a system is above the top lever guard and to the left of the original iron sight aiming wall. These two surfaces align parallel with the barrel, giving you the perfect two axis lock necessary for an accurate targeting system.
Another thing to note is the stock of this blaster; it is superb.

It is rigid, with almost no movement when attached to the blaster. Unlike the Raider stock's variable length locking system, this stock's lock reassembles a military style lock with a simple rod that slides in a hole, locking both directions of movement instead of just one. Although it is very possible to 3D print an adapter so this stock can be used on any Nerf blaster with a stock attachment interface, I can't be bothered designing such adapter.
I didn't carefully record FPS measurements (partly because I didn't want to use up new darts), but from the numerous shots I fired, this blaster shoots around 150 FPS with new/tight fitting elite darts inserted fully into the barrel with a push rod. With fully inserted used/loose fitting elite darts, the blaster cranked out an approximate average FPS of 140.
Comparing this blaster to the z100 pistol, it is without a doubt more powerful. From a simply side by side shot comparison using nothing but your own senses, you will easily notice the difference. With our z300 chrony data and using Torukmakto4's z100 chrony data (which we roughly verified), the z300 is approximately 15% more powerful. This is consistent with JT SplatMaster's own advertised specs. Other things worthy of mentioning is that the z300's barrel is slightly smaller than the z100's, resulting a tighter dart fit. This is good for muzzle velocity, but in the heat of the battle, you might accidentally squish a dart when trying to load the blaster (on a side note, we recommend twisting the dart during insertion to avoid this). In addition, the z100 comes battle ready right out of the box, while the z300 requires some tinkering to make it viable. The advantage of the z300's lever cock system also seems pointless if you are single loading darts, as you have to reacquire your aim from the motion anyways. In general, despite both blasters being high quality and well engineered, the z100 is a more thought out blaster. And straight out of the box, besides the power difference, the z100 fits Nerf applications better in every other way.
So now, the big question: is it worth the $50 price tag? The simple answer is: no. As I have mentioned in the beginning, I took a risk when purchasing this blaster. I was hoping for a spring platform that I can modify to turn it into my long range weapon. Although this is not exactly what I was hoping for, it definitely was much more than what I expected. I am not too fond of the seal, and for my purposes, the plunger is a bit too small. If I tried, I could probably find a replacement spring that will boost the performance up by around 10%. But I highly doubt the blaster will reach my personal goal of a 200 FPS spring blaster without heavy modifications, which in my opinion, sort of defeats the point of buying a premade product intended for improvement. I mean what's the point of buying something if it takes you more time to make it into what you want than to start from scratch and simply make your own home made one? I will probably just add some sort of aiming system to the blaster and call it a day. Because of its performance advantage, it will replace the z100 in my load out. To the rest of the Nerf community, if you are too lazy to make a home made blaster (like I was) I recommend getting the z100 and the JT holster for it (FYI, the cleaning sticks that come with the z100 and z300 are good push rods). I already used the z100 in an indoor Nerf battle and it was crazy amounts of fun, especially since I was going against mostly stock blasters muhahahahha. If the z100 concept is exactly what you are looking for and you absolutely crave a bit of additional power, go for the z300 and you won't be disappointed.
https://jtsplatmaster.com/jt-splatmaster-z300-sniper. I ordered mine online through Walmart because it was the cheapest deal I could find with ... nerfsniper.blogspot.com
ReplyDelete